
Gotta love the slogan, and the homemade root beer, but...
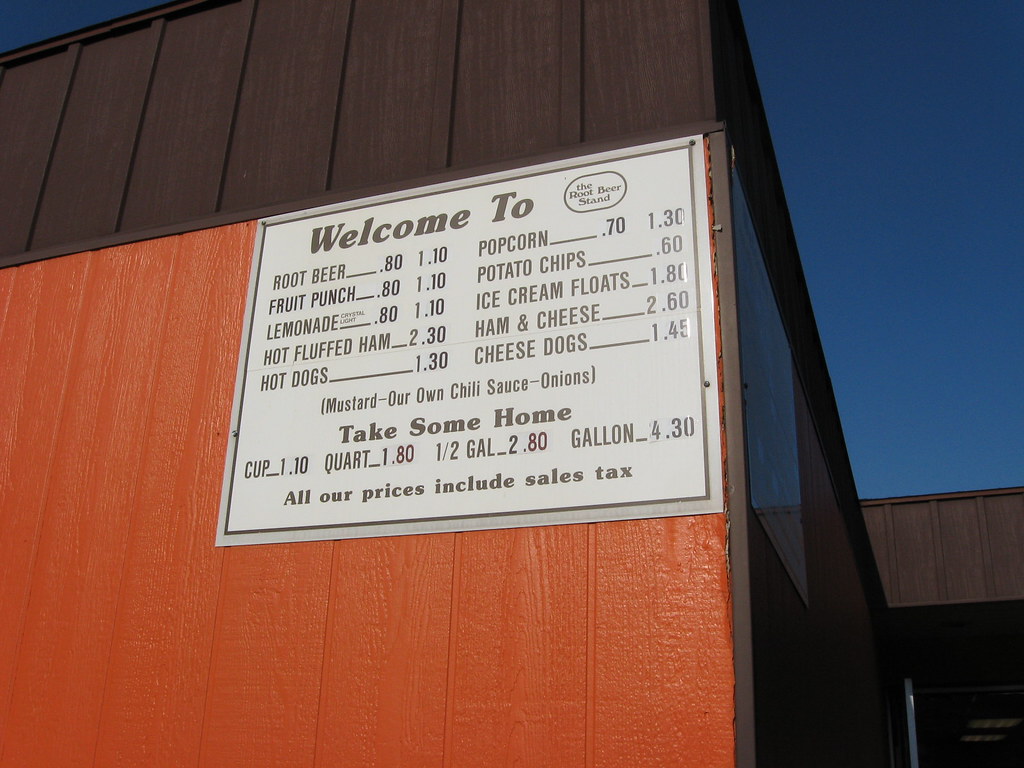
Can someone please tell me what, exactly, is "hot fluffed ham"??

For the, like, two archaeologists out there who read this blog, and anyone else of the scientific persuasion, here is another fine piece of unnecessary snack-food-based research. As in other scientific fields, archaeologists frequently must grapple with the problem of practical and meaningful classification of objects, in our case typically artifact classification. And anyone who has ever taken (or worse, taught) an introductory archaeology class will remember that first torturous day of discussing taxonomy, typology, assemblages, seriation, and other similarly confusing terms.
This is apparently an old webpage, but it's new to me. Here a biologist attempts to create a taxonomy of animal crackers based on their recognizable and classifiable features. Taste did not factor into the classification scheme, but I do believe that I have personally eaten my way through this entire taxonomy.
CLASSIFICATION OF ANIMAL COOKIES, ANIMAL CRACKERS, AND RELATED TAXA
by Mark E. Eberle, Fort Hays State University.
See also: peeps research.
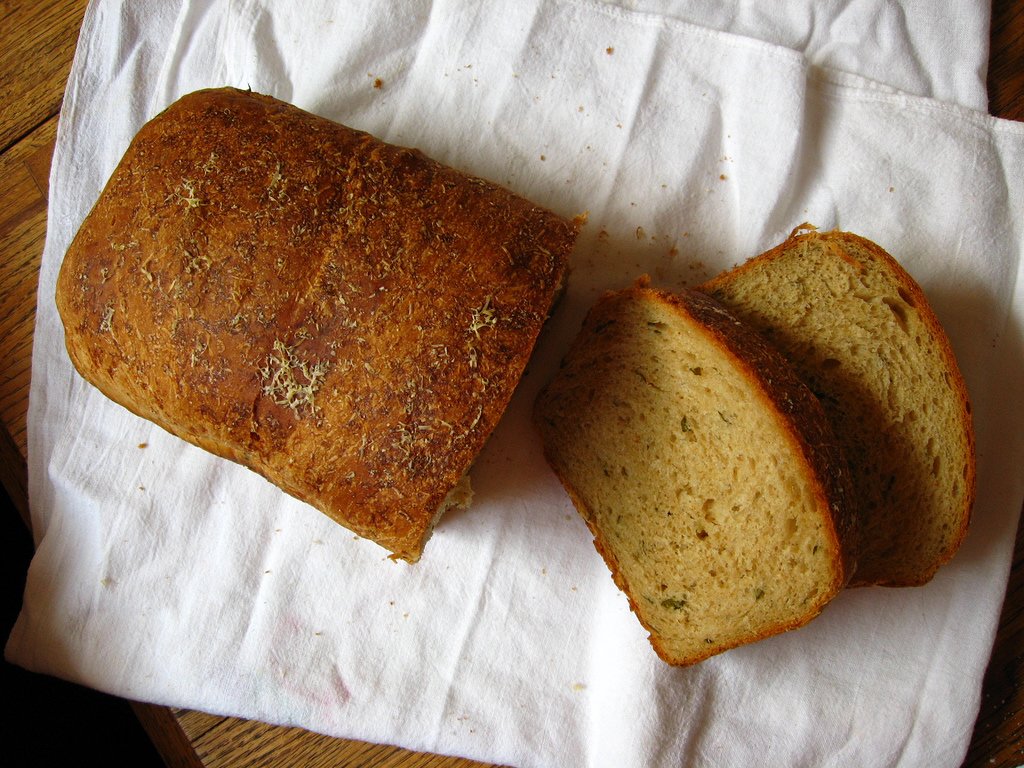
I gave up on my basil plant long ago (along with my other herbs, it was a victim of my unintentional but deadly neglect), but luckily for most of the year it's readily available at any of LA's many farmer's markets. A few weeks ago I bought the most enormous bunch of basil- really, it was like a small tree's worth- and after making two batches of pesto, I still had plenty left.
This bread was a good vehicle for the remaining basil, its pungent aroma a nice complement to the warm nuttiness of whole wheat. The basil flavor was most prominent the first day, and faded a bit after that. Like most bread, it freezes well, but again you lose some of the basil flavor with freezing. So really, you have no excuse not to eat it all straight out of the oven.
This is my entry for World Bread Day 2008, kindly hosted once again by Zorra.
Whole Wheat Basil Bread
adapted from The Bread Bible, by Beth Hensperger
Makes 2 loaves
Sponge:
2 tsp instant yeast (or 1 tbsp dry active, proofed in some of the liquid)
pinch of sugar
1 1/2 cups warm water
2 cup whole wheat flour (I used white whole wheat)
Dough:
1 cup warm buttermilk
1/4 cup honey
4 tbsp butter, melted and cooled
1 cup whole wheat flour
2 to 2 1/2 cups unbleached all purpose flour
1/2 cup minced basil
2 1/2 tsp salt
melted butter and Parmesan cheese for topping the loaves
-Sponge: mix yeast, pinch of sugar, warm water, and 2 cups whole wheat flour in a large bowl (If using dry active yeast, first proof the yeast in 1/4 cup of the water, then mix with other ingredients). Cover with plastic wrap and let sit at room temperature for 1 hour.
-Dough: Add honey, buttermilk, basil, and butter to the sponge. Add flour, 1/2 cup at a time, stirring well after each addition, until dough pulls away from the sides of the bowl. Cover and let rest for 20 minutes while you prepare your kneading space. This will give the dough time to fully absorb the flour and make it easier to knead.
-Kneading: Turn dough onto lightly floured surface and sprinkle salt on top. Knead dough for about 6 minutes, until salt is evenly distributed and dough is smooth and springy. Add more flour as need to prevent sticking (but not too much, you want a soft but not too sticky dough).
-1st Rising: Put dough in large greased bowl, cover with plastic wrap, and place dough in warm spot to rise until doubled in size (this typically takes about 1 to 1 1/2 hours, but keep an eye on it if your kitchen is very warm).
-2nd riding: Gently deflate dough and let rise a second time, which will take about half as long as the first rise.
-2nd rising: When dough has doubled in size again, turn it onto floured surface, gently deflate it, and divide dough into 2 portions. Shape into loaves and place into 2 buttered loaf pans. Cover with plastic wrap and let rise again until doubled in size, about 30 minutes.
-Baking: After you have shaped the loaves, preheat oven to 350 degrees F. When loaves have risen, brush with melted butter and sprinkle with grated Parmesan cheese. Place loaf pans in center of oven and bake for 50 to 60 minutes, until bread is golden brown. Remove from pans and cool completely on rack before slicing.
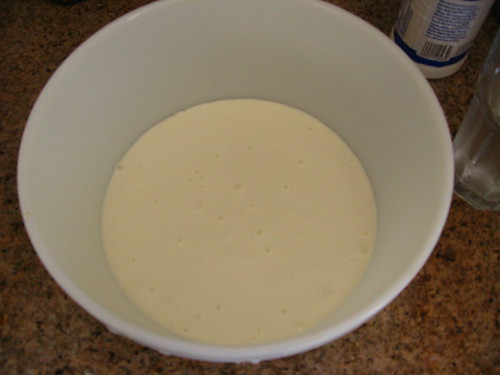

 Keep going...you can see that it's already turning yellow.
 Something's definitely starting to happen here.

 This cake is to celebrate the end of a long spring and summer working on the road, and (hopefully) a return to baking. I've missed it. As much as I love fieldwork, it gets exhausting after a while and I just want to go home and eat, sleep, and bake. I suppose that's one of the problems with working as an archaeologist, as opposed to just being a student.
The cake is very simple to make, but it's a real showstopper. It's your basic moist, rich bundt cake, but the addition of whiskey takes it to a fantastic new level. I took it to a potluck and got rave reviews.
I used this recipe from Epicurious, with a few additions. I nearly cut down on the amount of whiskey, thinking a half cup would be overkill... but I'm glad I didn't, as it was the perfect amount (I used Knob Creek bourbon). I also added about a cup of chopped bittersweet chocolate, which I'd highly recommend if you like your chocolate cakes really chocolatey - and I bet more chocolate would be even better. And since I only had a 6-cup bundt pan, I divided the batter between that and an 8-inch cake pan and baked the cakes for slightly less time than the original recipe calls for.
The cake is great on the day it's baked, but keeps really well and becomes almost fudgey when refrigerated. And even more boozy. Which can only be a good thing.
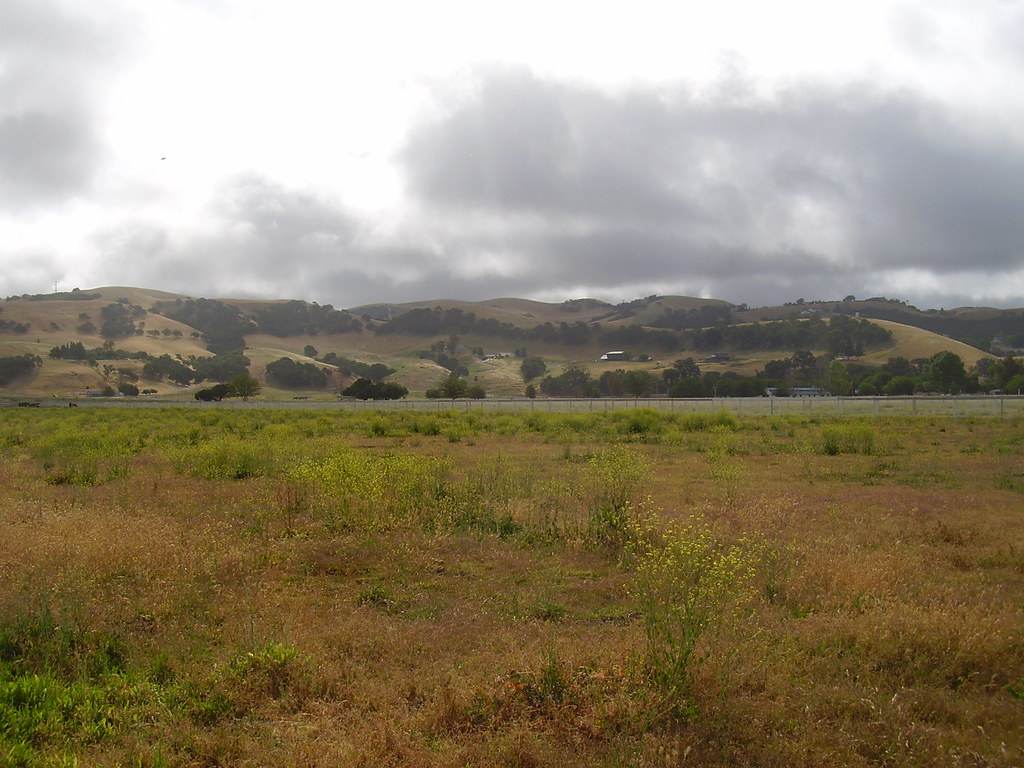 Stormy morning in Templeton
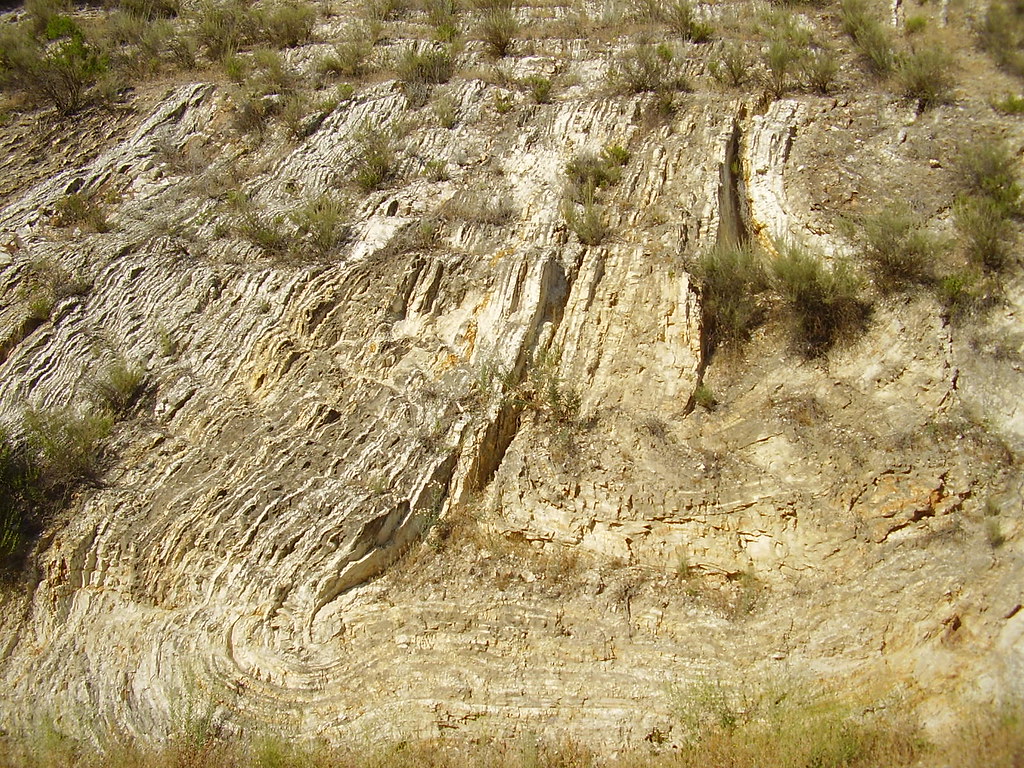 Crazy geology on the road to Lake San Antonio
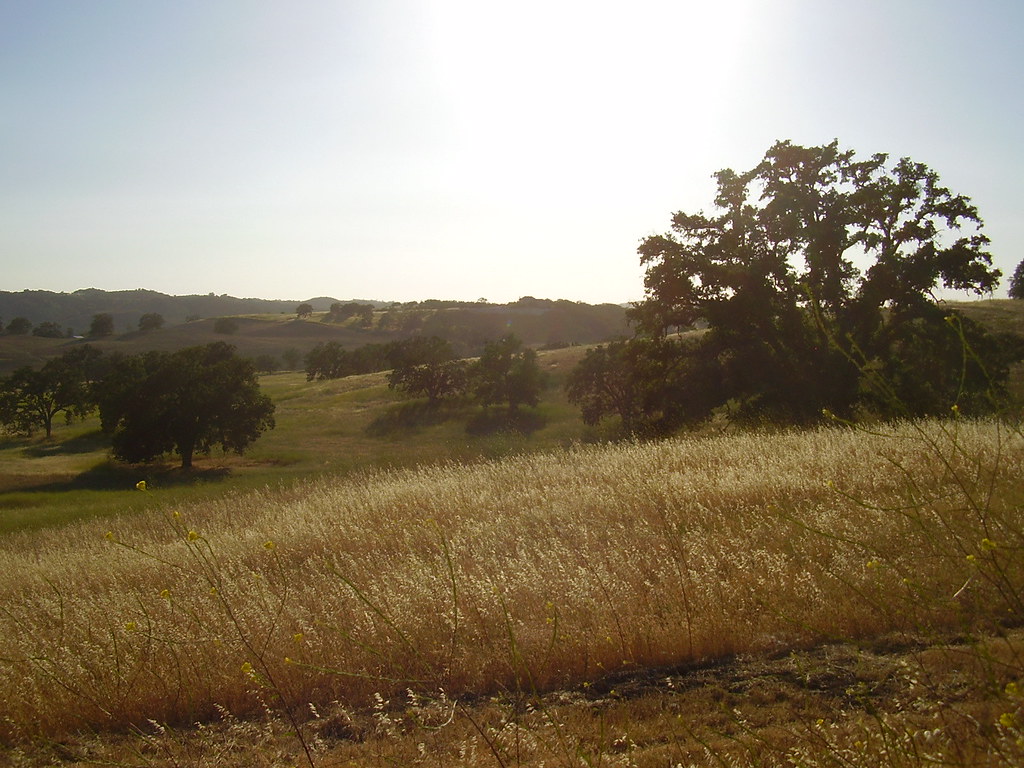 So pretty...SO...DAMN...HOT.
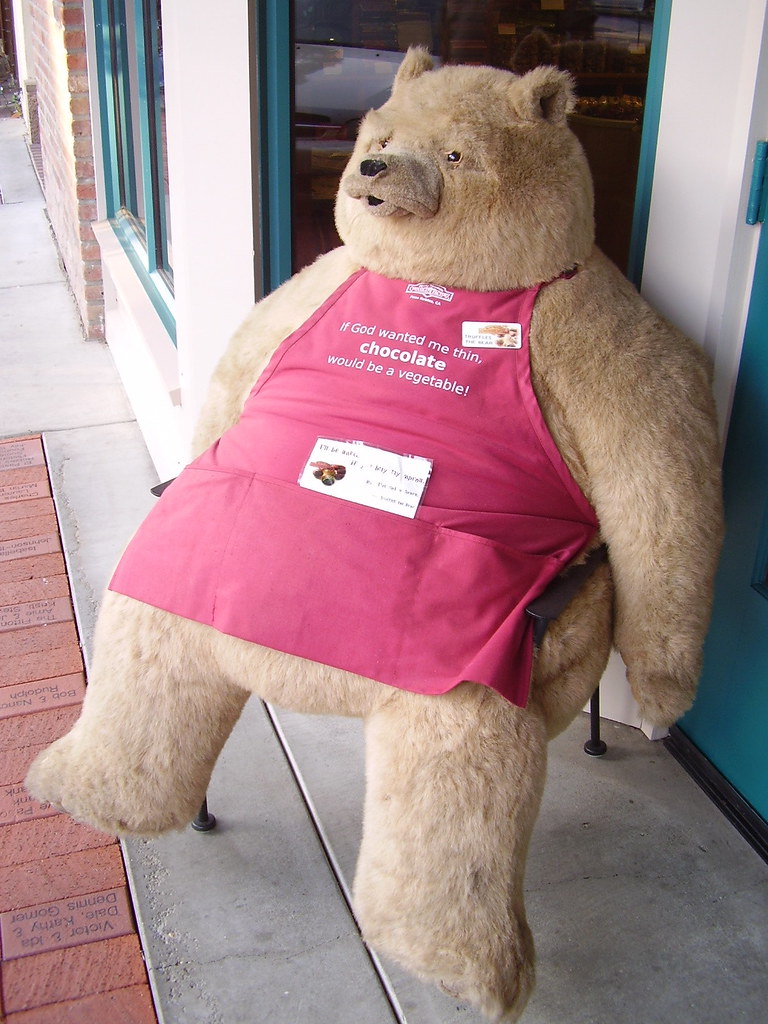
 Look, it's The Saddest Bear in the Whole World. He lives in the chocolate store in Paso Robles and is clearly suffering from the after-effects of a chocolate binge. I know the feeling.
What a week. I worked way too hard. I ate way too much grilled meat. And I hung out with my mom at the American Library Association conference in Anaheim. While we unfortunately missed the Book Cart Drill Team World Championship, I did get the unique (and somewhat terrifying) experience of having to fight several thousand librarians for free food and alcohol at Disneyland.
After all that, I think I deserve some ice cream. There may be no better dessert to make on this long and hot 4th of July weekend than cold, refreshing mint ice cream with chunks of mint flavored chocolate sandwich cookies.
Mint TKOs (Chocolate Sandwich Cookies)
Adapted from a recipe by Thomas Keller, in The Essence of Chocolate, by Robert Steinberg and John Scharffenberger
I just put peppermint extract into the white chocolate filling, but if you want to up the mintiness you could put some into the cookie dough as well.
makes about 3 dozen cookies (or 18 sandwiches)
Filling
1/2 cup cream
8 ounces white chocolate, chopped
Peppermint extract, to taste
Cookies
3/4 cup sugar
1 1/2 cups plus 3 tablespoons all purpose flour
3/4 cup plus 1 tablespoon cocoa powder
1/2 teaspoon baking soda
1 1/2 teaspoons salt
7 1/2 ounces butter (1 stick + 7 tbsp), room temperature, cut into small cubes
1. Make the filling: Place the white chocolate in a bowl. Bring the cream to a boil in a small saucepan over medium heat on the stove. Pour the hot cream over the chocolate and whisk together to melt the chocolate (it'll be lumpy at first, but then come together). Add peppermint extract to taste. Let cool until it has thickened enough to spread - it may take a few hours at room temperature.
2. Preheat the oven to 350 F. Prepare two baking sheets by greasing thoroughly or lining them with parchment paper.
3. Combine the sugar, flour, cocoa powder, baking soda, and salt in an electric mixer.
4. I recommend covering the mixer with a towel for this next step, unless you want cocoa powder all over your kitchen: With the mixer still running on low speed, add the butter a few pieces at a time. Let the dough continue mixing until it comes together - it should go from looking kinda like cornmeal to a cohesive mass. But do not overmix.
5. Turn the dough out onto a floured working surface and work into a solid block. Divide the block into two pieces.
6. Working with one piece at a time, roll out between two sheets of parchment paper until 1/8" thick. Using a cookie cutter, cut out shapes and place on the baking sheets about 1 inch apart.
7. Bake the cookies for about 12 to 15 minutes, rotating the sheets halfway through baking time. Remove from oven and let cool on baking sheets for a few minutes, then transfer cookies to wire racks and let finish cooling.
To assemble the cookies:
8. Cool cookies completely. Place half of the cookies upside down on a work surface. Using a small spoon, scoop a small amount of filling onto the center of each cookie. Top with another cookie right side up. Press the cookies together until the filling spreads out to the edges.
3. Stir together the egg yolks in a medium bowl and very gradually add some of the warmed milk, stirring constantly as you pour (a ladle is a good tool to use for this). Pour the warmed yolks into the saucepan, again stirring constantly.
4. Cook over low heat, stirring constantly and scraping the bottom with a heat-resistant spatula. Stirring and scraping is very important- you don't want the custard to cook too quickly and lump onto the bottom of the pan. Cook until the custard thickens enough to coat the spatula.
5. Strain the custard into the heavy cream, then stir in peppermint extract (I used 1 tsp, but it could have used a little more - add to taste, and remember that the flavor will be a little less intense once the ice cream is frozen).
6. Chill thoroughly (at least 8 hours is ideal), then freeze in your ice cream maker according to the manufacturer's instructions.
I recently went back to the Twin Cities, Minneapolis/St Paul, Minnesota, for my college reunion. Now, it seems that many people (especially Californians, for whatever reason) are sadly ignorant of these wonderful cities. Here is a sample of some of the questions I've been asked by seemingly intelligent, well-educated Californians when I tell them that I went to college in Minneapolis/St Paul:
-Where's that?
-That's so far north. Doesn't it get cold there?
-Is St Paul a small town?
-Minnesota? Is that a city or a state?
(Answers:
-North of Iowa, west of Wisconsin...wait, you don't know where Wisconsin is either?
-Um, yes.
-No. It is the capital of Minnesota, and the Twin Cities metro area has a combined population of 3.2 million.
-For pete's sake people, did you not take 5th grade geography?!)
In any case, let's just say that Minneapolis and St Paul are delightful places and I will gladly take any excuse to go back and visit, especially during the early summer months, when the whole place is in bloom, the trees and grass a vibrant shade of green and the locals taking advantage of every minute of the nice weather, since they know it won't last.
In addition to reconnecting with long-lost classmates, I also spent much of the trip eating. In two short days I consumed an embarrassing amount of ice cream, which isn't all that unusual for me I suppose, but I had an excuse this time: 1) the Twin Cities have some great local creameries, and 2) Los Angeles, my current home town, has none, as far as I can tell (Seriously, if anyone knows of a great place to get ice cream in LA that is not a Pinkberry or Coldstone or other chain store, let me know).
Some photos from my trip:
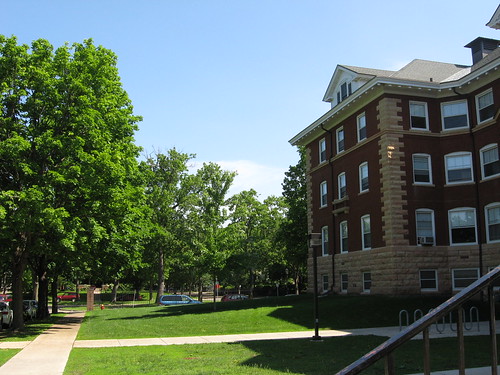 Campus: The dorms I got stuck in definitely weren't this pretty.
 College was such a blur... I can't believe I spent a whole year in this horrid room.
 Spoonbridge and Cherry, in the Walker Art Museum's sculpture gardens
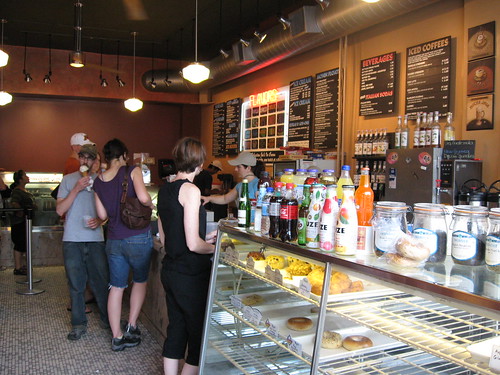
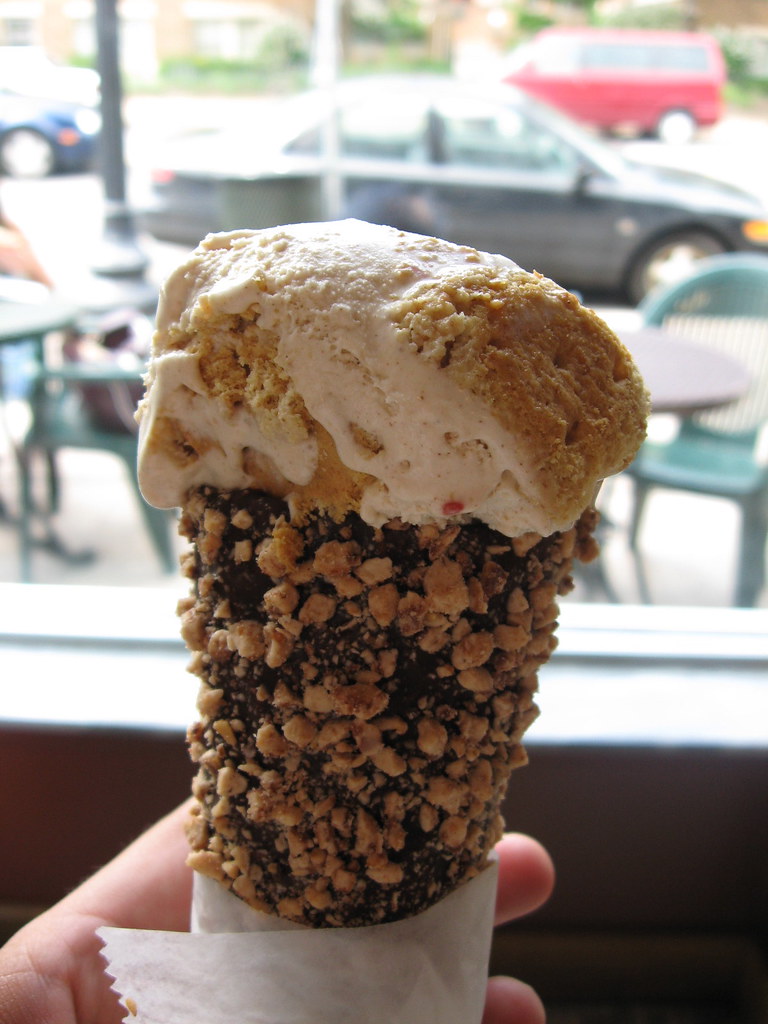 Cinnamon Crunch ice cream- cinnamon ice cream with graham crackers. Seriously good- I'm going to try to make this at home. The cone is a homemade waffle cone coated in chocolate and heath bits. The chocolate and heath went well with the ice cream, but the the waffle cone itself was so-so.
 My favorite creamery in the Twin Cities- Izzy's in St Paul. I love everything this place does.
  With every scoop you order, you also get a free "izzy"- basically a mini-scoop on top. This is "Irish Moxie" (irish cream and coffee ice cream with chocolate cookies and toffee bits) with a Norwegian Chai izzy. Don't know exactly what's in the norwegian chai - although it has a prominent cardamom flavor- but it's one of my favorites. The Irish Moxie was also fantastic.
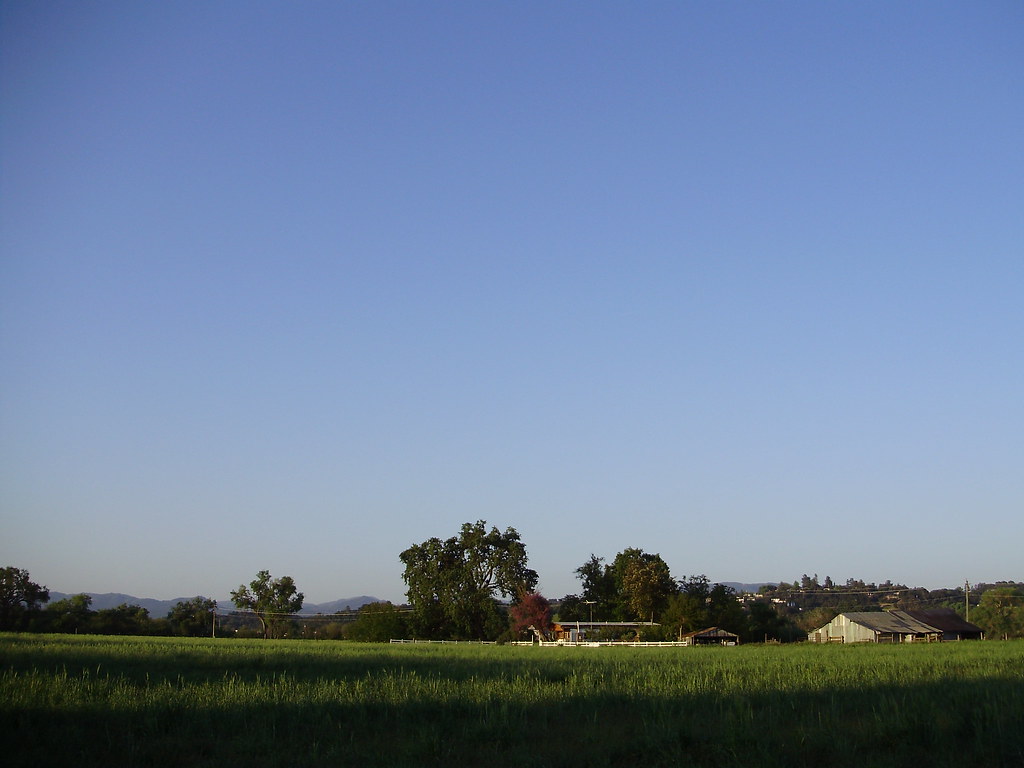
 Sunrise near Paso Robles, a lovely place to be.
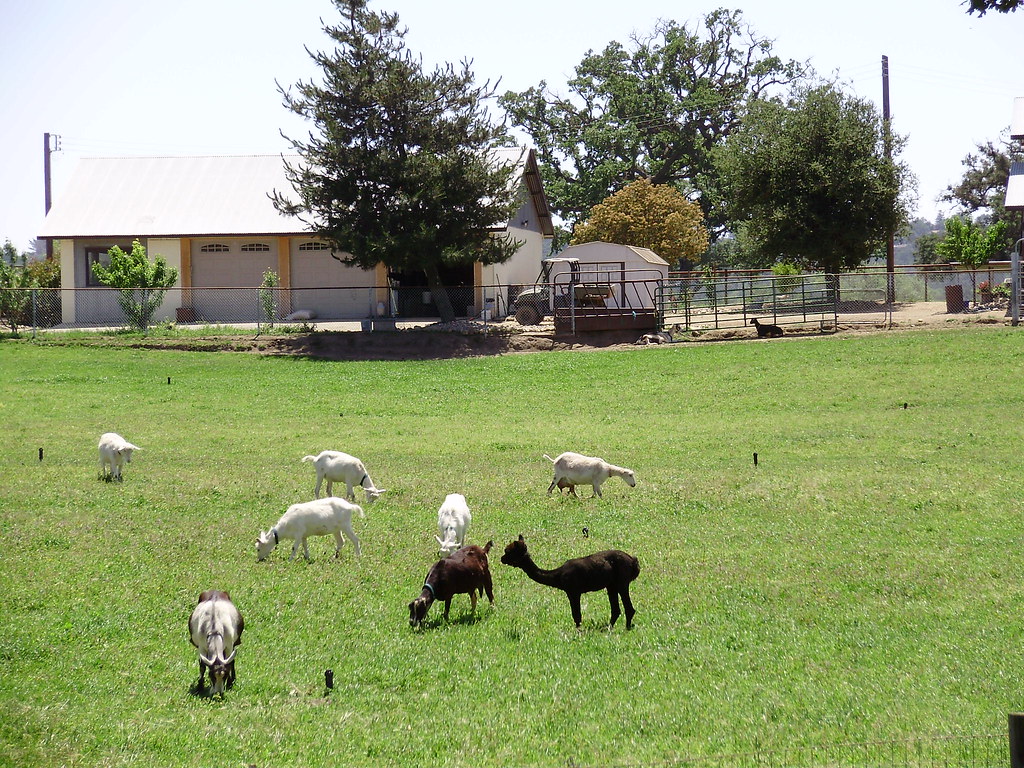 He thinks he's a goat...
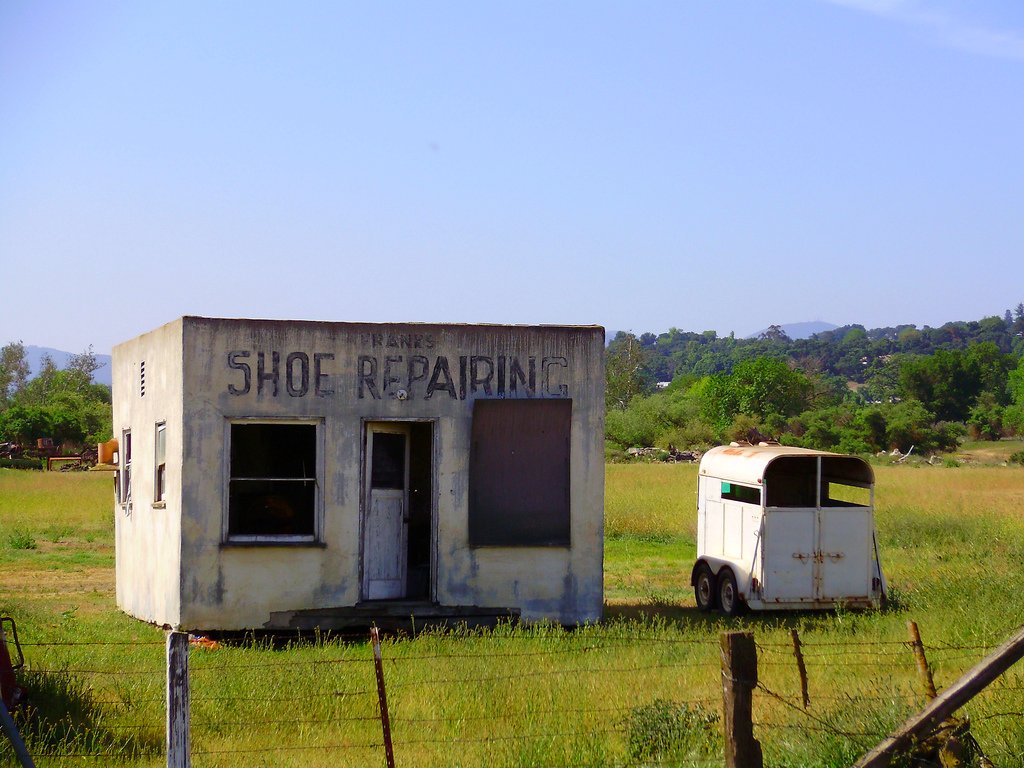 Shoe repair, anyone?
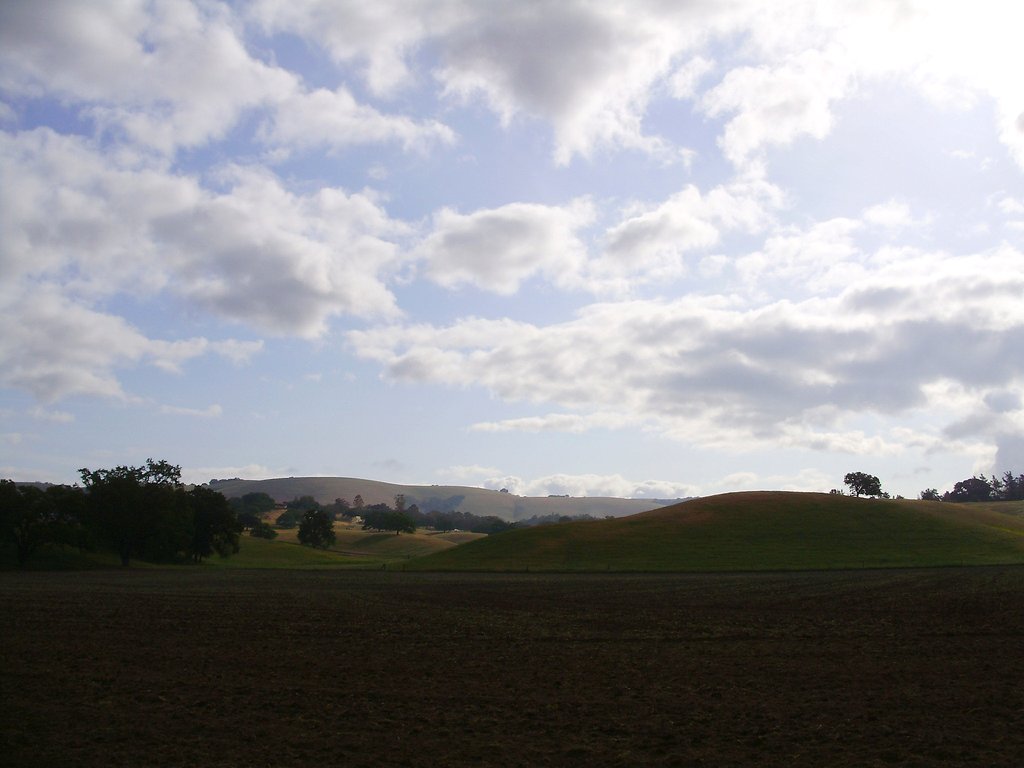
 Farm near Paso Robles...lots of farms 'round here.
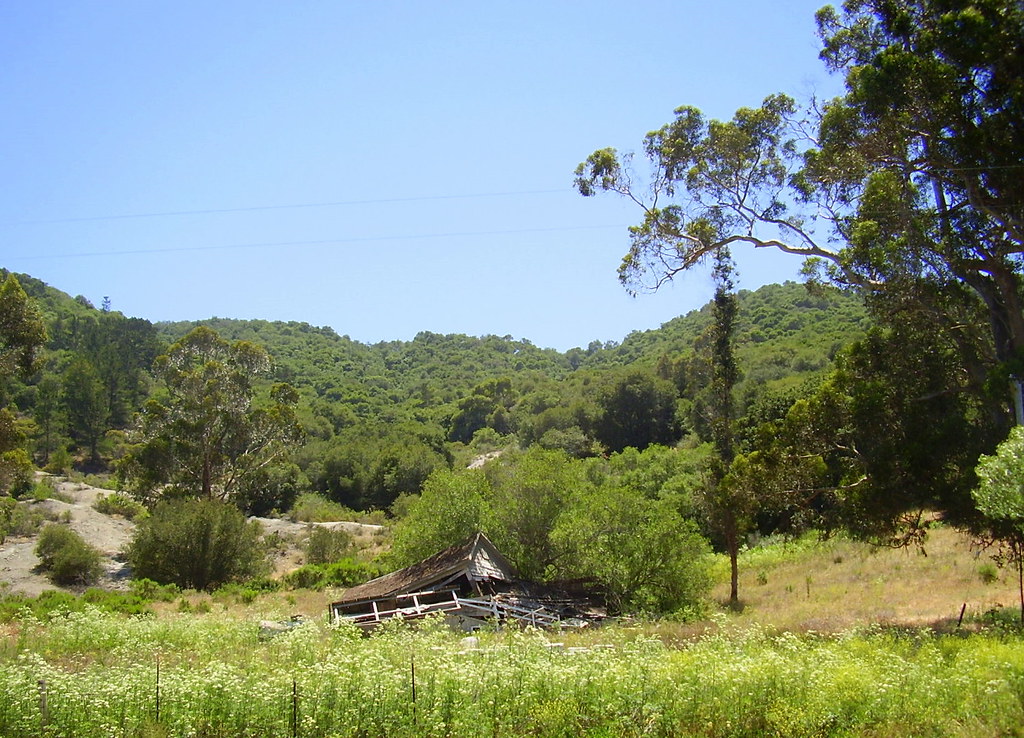 House fall down.
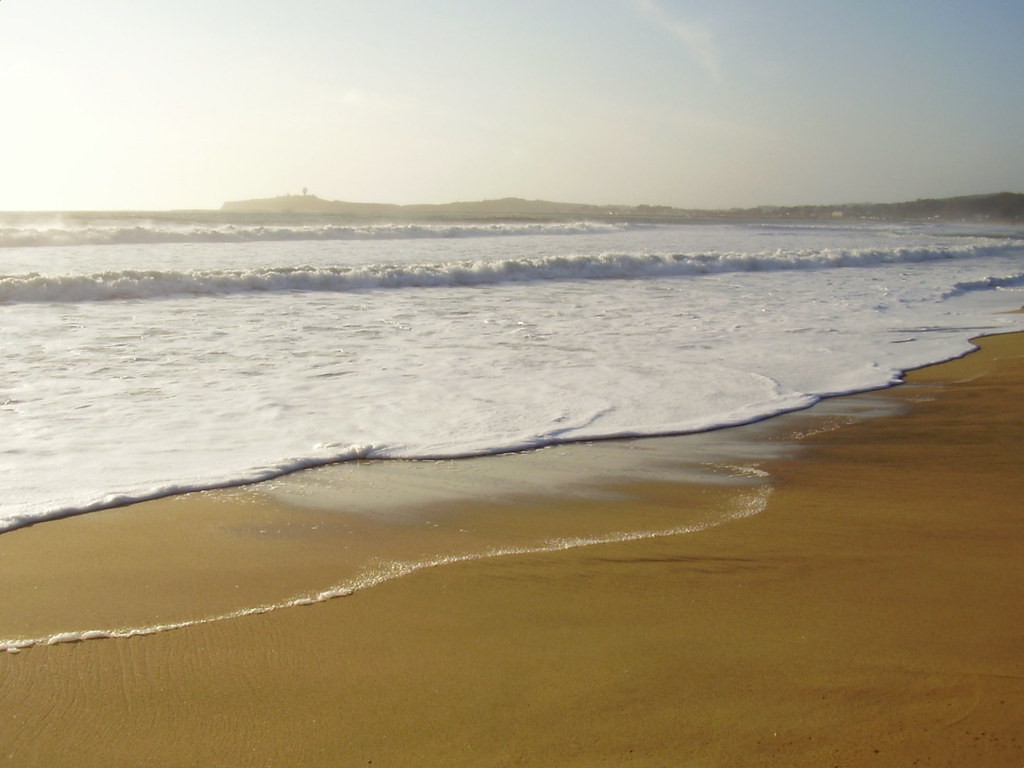
 Port San Luis, near Avila Beach.
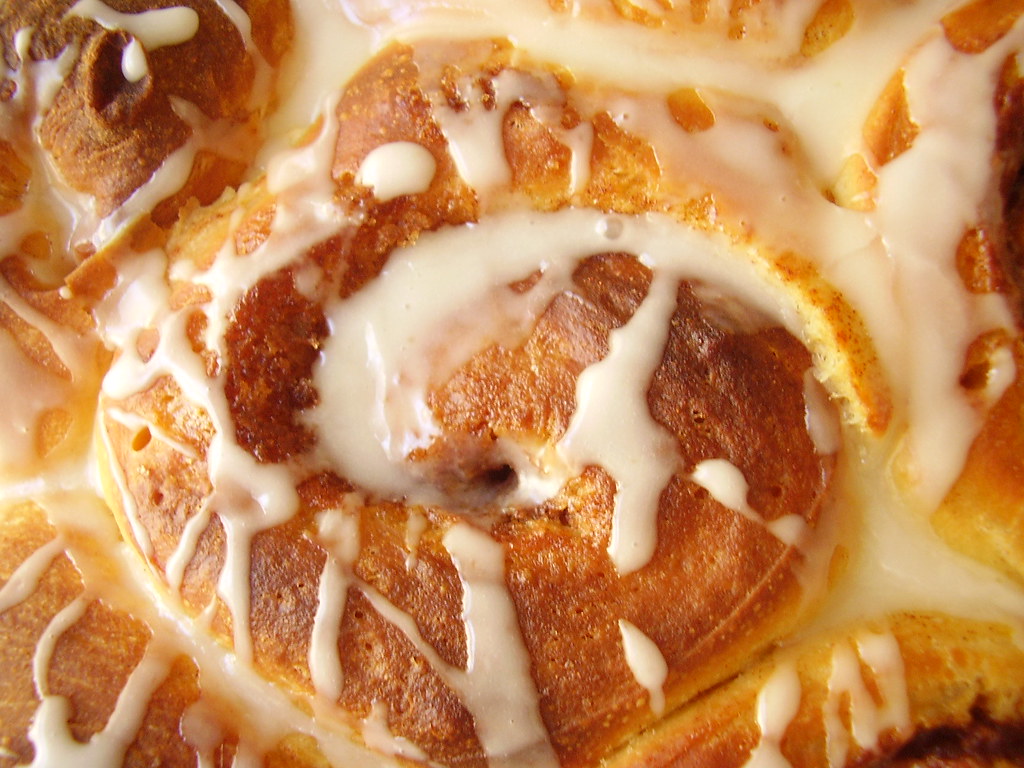
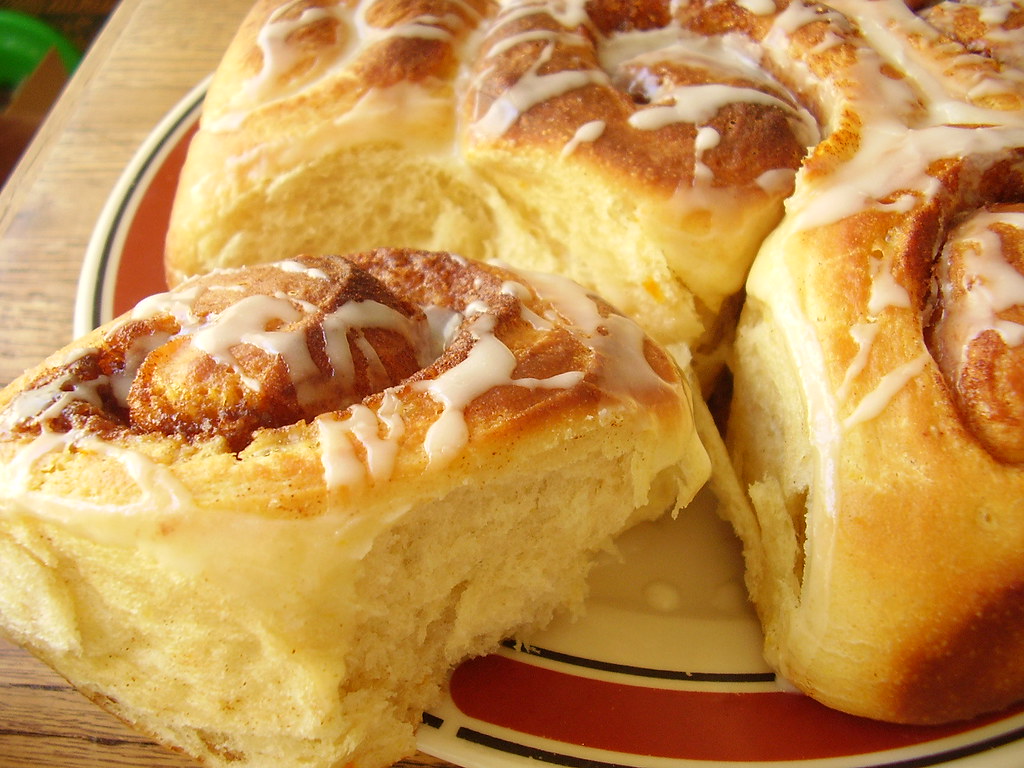
Being out of town often as I have been for the past few months, I've had little chance to bake. So my boyfriend's birthday provided the perfect opportunity, and having only two days at home wasn't going to stop me. Luckily this recipe requires minimal effort. Like any yeast recipe, though, it does require time, patience, and some planning ahead.
This recipe will make a small batch of rolls, perfect for 2 or 3 people. Double it if you need a bigger yield. The dough is prepared the night before and has its final rise in the fridge overnight--then in the morning, they just need to come to room temperature before they're put in the oven. This is perfect for someone like me, who lacks the motor skills and mental alertness needed to bake until after noon at least. I am not a morning person.
Orange Cinnamon Rolls
Adapted from this recipe
Makes 6 rolls
Dough:
Zest of 1 orange
1/2 cup milk
2 tablespoons unsalted butter
1 3/4 cups (or more) unbleached all purpose flour, divided
1/4 cup sugar
1 large egg
1 teaspoon rapid-rise yeast
1/2 teaspoon salt
Filling:
1/3 cup (packed) golden brown sugar
1 tablespoon ground cinnamon
2 tablespoons (1/4 stick) unsalted butter, room temperature
Glaze:
powdered sugar
orange juice
see step 12 below.
The night before:
1. Combine milk and butter in glass measuring cup. Microwave on high until butter melts and mixture is just warmed to 120°F to 130°F,
2. Pour into a large bowl. Add 1/2 cup flour, sugar, egg, yeast, zest, and salt. Mix thoroughly.
3. Add remaining flour. Mix until flour is absorbed and dough is a coherent mass, but still a bit sticky. If dough is too sticky to handle, add more flour, 1 tablespoon at a time, until dough begins to form ball and pulls away from sides of bowl.
4. Turn dough out onto lightly floured work surface. Knead until smooth and elastic, adding more flour (sparingly) if sticky, about 8 minutes.
5. Lightly oil large bowl. Transfer dough to bowl, turning to coat. Cover with plastic wrap. Let dough rise in warm draft-free area until doubled in volume, 1.5- 2 hours.
6. Meanwhile, prepare filling by mixing brown sugar and cinnamon in small bowl.
7. When dough has doubled in volume, gently deflate and transfer to floured work surface. Roll out to 8x11-inch rectangle.
8. Spread butter over dough, leaving 1/2-inch border. Sprinkle cinnamon sugar evenly over surface. Starting at 1 long side, roll dough into log, pinching gently to keep it rolled up. With seam side down, cut dough crosswise with thin sharp knife into 6 equal slices.
9. Butter a pie pan or 8- or 9-inch round cake pan. Arrange rolls in pan, cut side up (there will be almost no space between rolls). Cover pan with plastic wrap, then kitchen towel. Put dough in refrigerator and let rise overnight.
The next morning
10. Remove rolls from refrigerator an hour before baking and allow to come to (near) room temperature and complete their second rise.
When driving through Cambria, CA, I came across a sign pointing to a California State historical site called "Nitt Witt Ridge". What?
I had to find out what that was. I drove up a steep hill and there it was: Nitt Witt** Ridge in all its bizarre glory.
Since I can't find the appropriate words to describe this place, I will quote from a brochure I picked up by the front gate:
"Art Beal, [also known as Captain Nit Wit or der Tinkerpaw], born in Oakland of Irish and Native American parentage, spent much of his childhood in orphanages.
He built a three-level fantasy environment from collected materials in Cambria, which locals call the Poor Man's Hearst Castle. This has a literal basis, as some construction material was scavenged from the Hearst estate. It helped that Beal was a local trash hauler, and had trouble discarding things...With a pickax and shovel, he hollowed out a 2.5 acre hillside in Cambria, using collected trash as landfill, to create an intricate network of terraced gardens, buildings, ornamental stone arches, fountains and walkways."
Unfortunately, the house was fenced off and closed to the public, so I didn't get to see the interior. But the exterior alone is pretty cool. Beal used found materials, both natural and manmade, to both construct and decorate his "castle", using beer cans, car parts, abalone shells, old stoves, toilets, and other unusual elements. Beal began construction of his house in 1928, and built it up over the next 5o years. Beal died in 1992 at the age of 96, and the house is now listed as a California Historical Landmark, considered representative of "one of California's remarkable folk art environments".
 one of many toilets
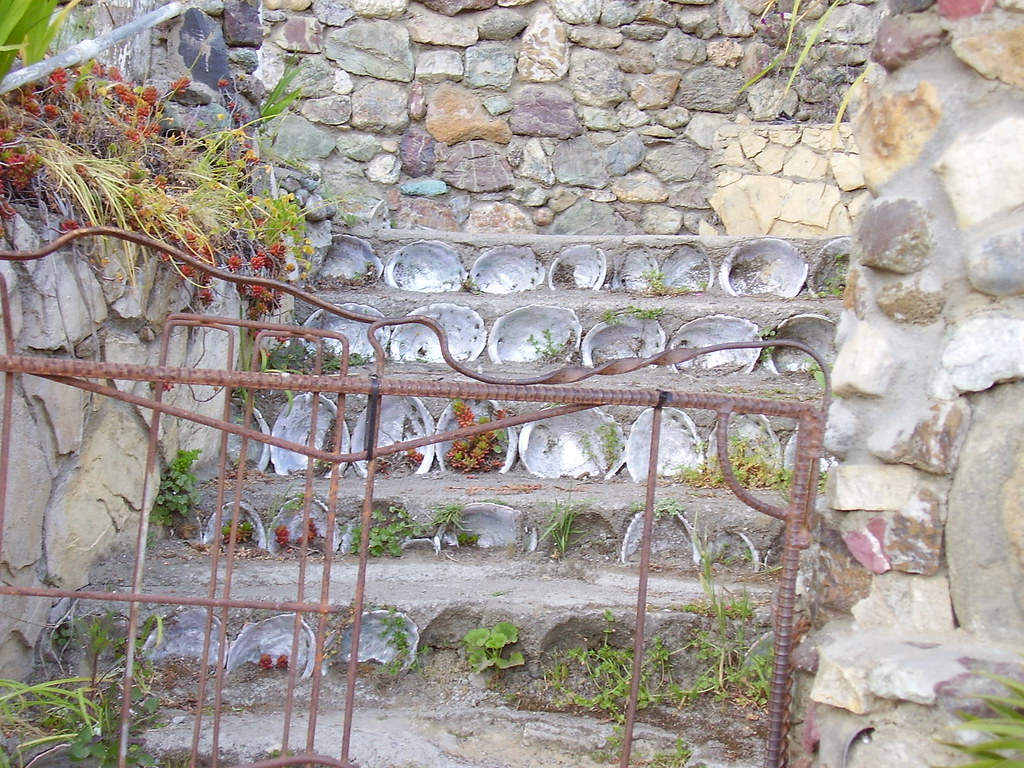 Abalone shells inlaid in the stairs
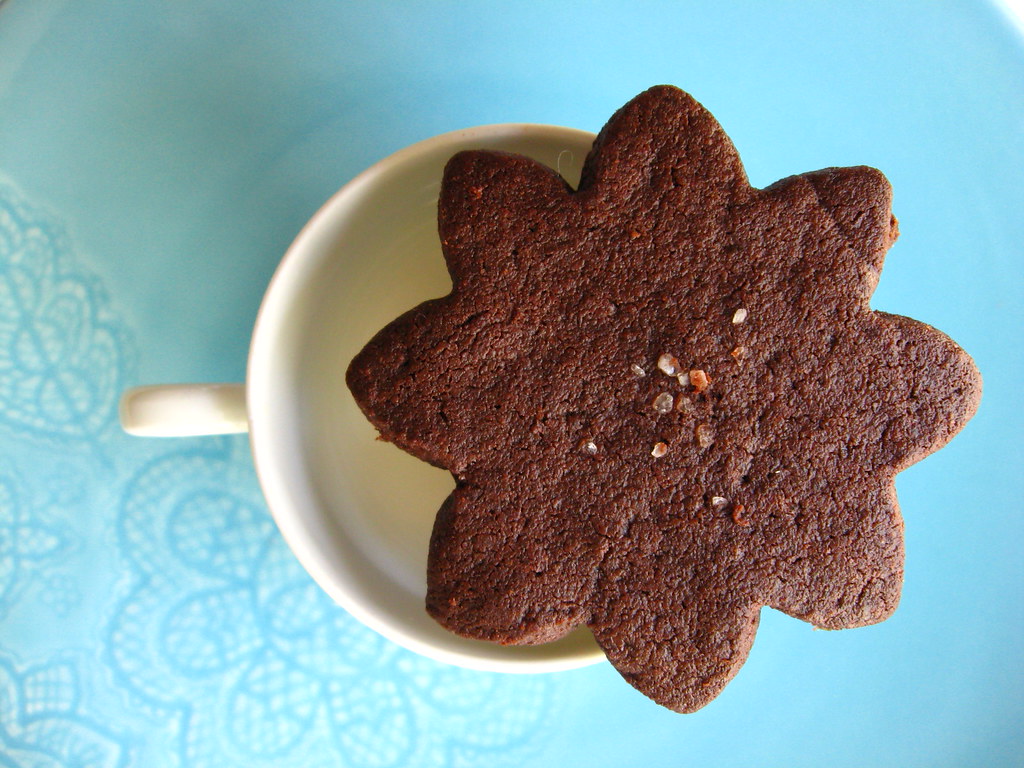
If you're a fan of the combination of chocolate + salt, this is the cookie for you. It's deeply chocolaty, not too sweet, and very salty. Use a fine-grain sea salt for a uniform saltiness, or a more coarse grain for little nuggets of salt in every bite.
The only major change I made from the original recipe was to omit the cacao nibs it called for, because I didn't have any. And while I'm sure the nibs would give a great flavor and texture, the cookie is fantastic without them. No need to get too fancy.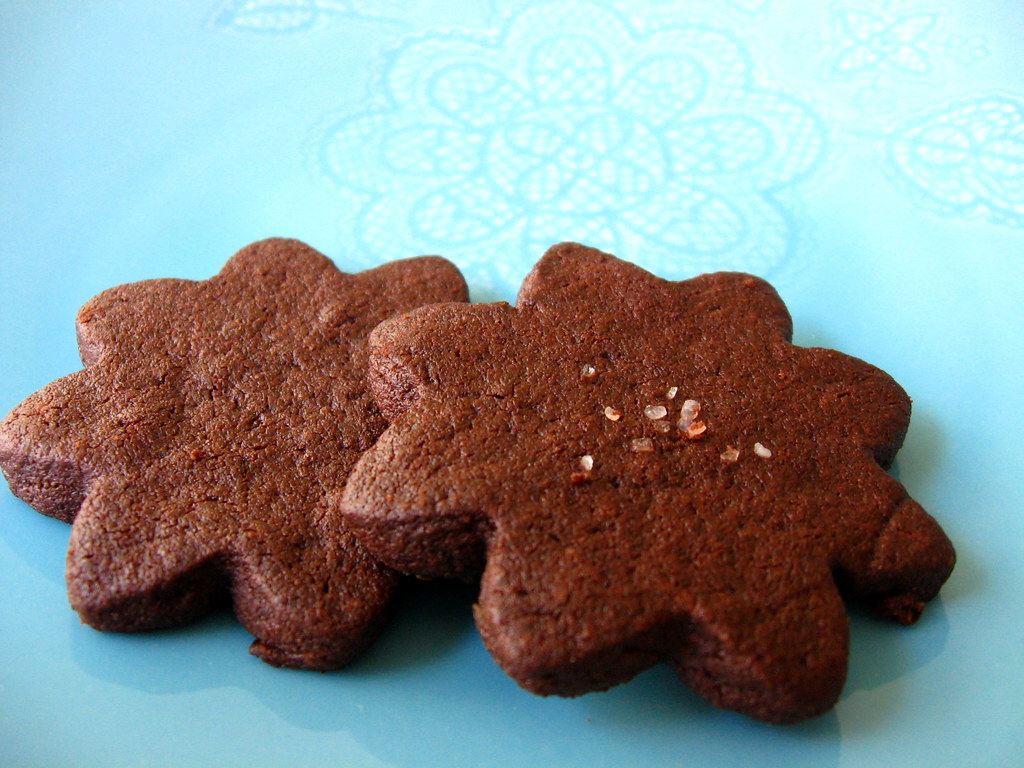
Chocolate Shortbread with Sea Salt
adapted from Essence of Chocolate by John Scharffenberger and Robert Steinberg
5 ounces (1 cup) all-purpose flour
2 1/2 ounces (3/4 cup) cocoa powder
1 teaspoon sea salt
6 ounces (12 tablespoons) butter, room temperature
3 1/2 ounces (1/2 cup) granulated sugar
1 teaspoon vanilla extract
1. Mix the flour and cocoa powder in a bowl.
2. In another bowl or in a stand mixer, beat the butter and sugar together for about 5 minutes until light colored and fluffy.
3. Add in the vanilla.
4. Add half of the flour-chocolate mixture and combine on low speed. Add the rest of the mixture and mix until just incorporated.
5. Add in the salt and mix to combine.
At this point the dough can be wrapped in plastic and stored in the refrigerator for up to a week. But if you want to finish the cookies now, no refrigeration is necessary.
6. Baking: Preheat the oven to 325 degrees F and line baking sheets with parchment paper.
7. Roll out the dough between two sheets of parchment paper to 1/4-inch thickness.
8. Using cookie cutters or a plain old knife, cut the dough into whatever shape you want. Sprinkle a few grains of coarse sea salt on top of a few cookies if you want to get crazy.
9. Place the shapes on the prepared sheets and bake for 15 minutes, rotating halfway. The shortbread should be slightly firm but not hard.
Let cool on wire racks.
The cookies can be stored in an airtight container for up a week. The texture is best on the day of baking, but the chocolate flavor deepens after a few days.
 Roman mosaic from Tunisia, 3rd-5th century A.D.
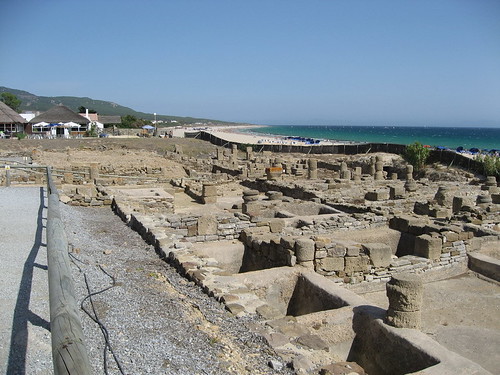 Garum production tanks at Baelo Claudia (Spain)
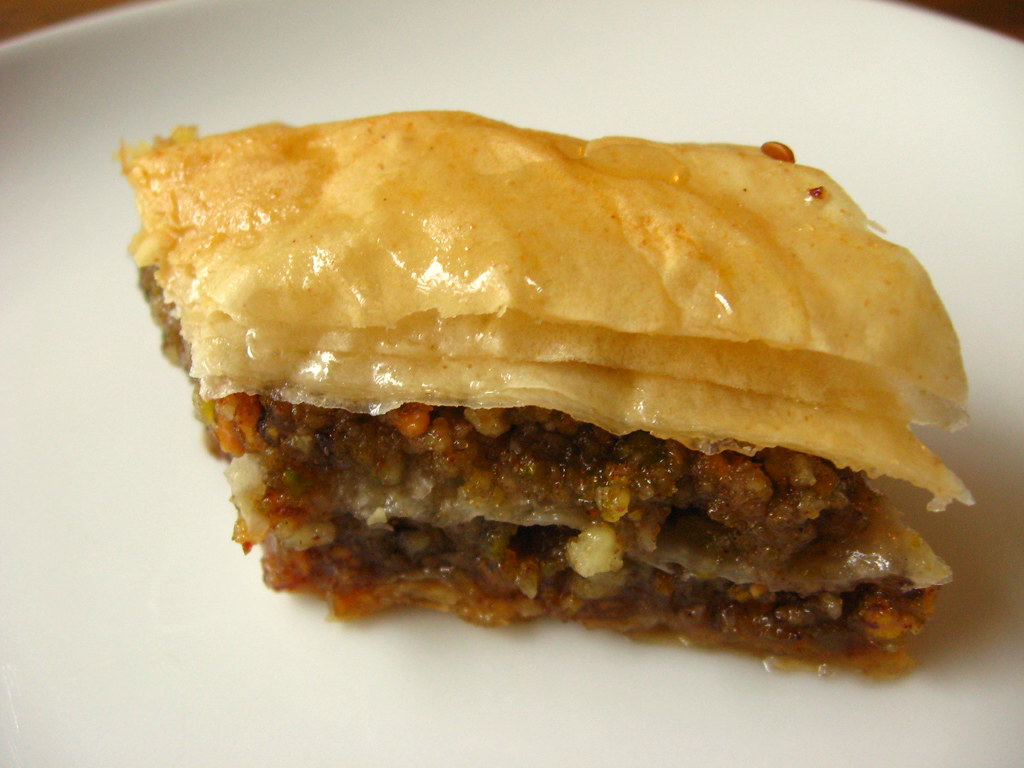
Well, I'm just back from another trip up to Half Moon Bay, but this time I actually had to work. I was working as an archaeological monitor, which basically means that I stood around a construction site and made sure no one accidentally dug up any artifacts.
Oh well--if you have to work, there are few more beautiful places to do it.
Of course it also helps that in addition to beaches and parks, the tiny town of Half Moon Bay has some great restaurants, two excellent bakeries and four (!) independent bookstores. Lest I sound to much like a travel brochure, I should also add that HMB has godawful traffic to rival L.A.'s.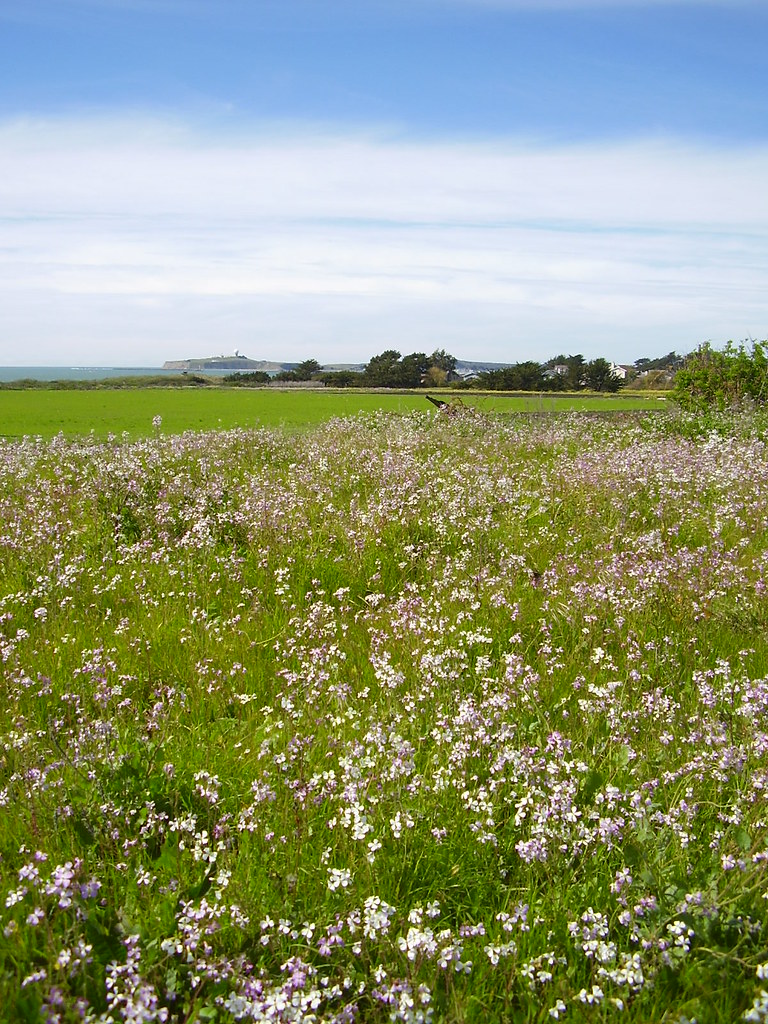


Filling:
1 cup raw or blanched almonds, and 1 cup shelled pistachios, finely chopped or ground (I don't like huge chunks of nuts, so I tend to grind them pretty fine)
2 tablespoons sugar
1 teaspoon ground cinnamon
1/4 to 1/2 teaspoon ground cardamom
1/2 pound (about 12 square sheets) filo dough
About 1/2 cup (1 stick) melted butter
1. Syrup: Stir the sugar and water over low heat until the sugar dissolves, about 5 minutes. Stop stirring, increase the heat to medium, and cook until the mixture is slightly syrupy, about 5 minutes. Remove from heat and stir in rosewater. Let cool completely.
2. Filling: Combine nuts, sugar, cinnamon, and cardamom in a medium bowl.
3. Preheat the oven to 350 degrees. Butter a 9 by 9 inch square pan.
4. Assembly: Place a sheet of filo in the pan and lightly brush with butter. Repeat with 4 more sheets. Spread with half of the filling. Top with 2 more sheets, brushing each with butter. Spread with the remaining filling mixture and end with a top layer of 5 sheets, brushing each with butter. Trim or fold under any overhanging edges.
5. Using a sharp knife, cut 6 equal lengthwise strips through the top layer of pastry. Make diagonal cuts across the strips to form diamond shapes.
6. Bake for 20 minutes at 350. Reduce the heat to 300 degrees and bake until golden brown, about 15 additional minutes.
7. Cut through the scored lines. Drizzle the cooled syrup over the hot baklava and let cool completely, at least 4 hours. Cover and store at room temperature for up to 1 week.


